 Bo Wu
Bo Wu
Quick Navigation
Been guiding photographers to the Hanging Temple for over eight years. Here's the raw truth: most travel blogs give you generic advice like "go early" or "bring a wide lens." They forget to mention that the temple's best angle is from the opposite cliff, not from the entrance. Or that your international credit card won't work for online booking. Let me fix that right now.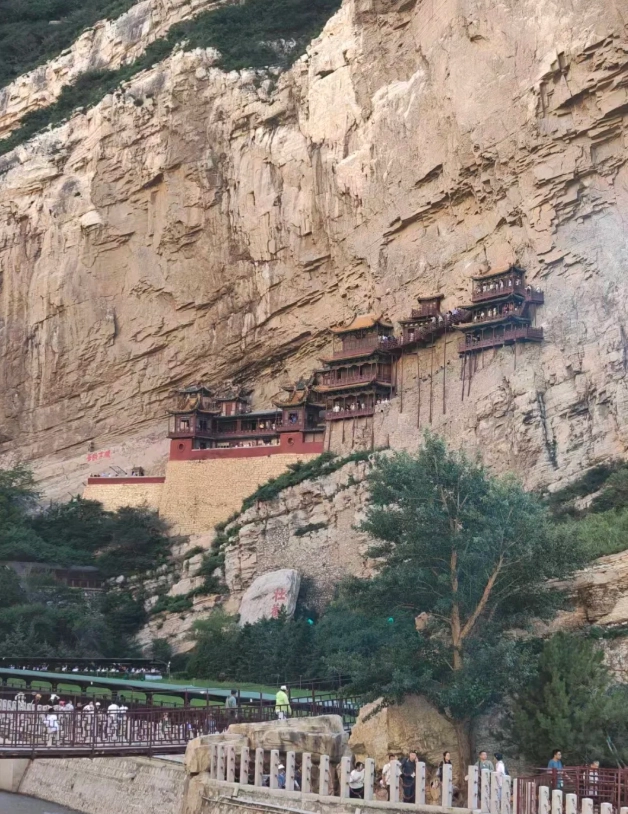
Now let's break down every detail you need to nail those photos without the frustration.
Best Time to Photograph the Hanging Temple
Light quality makes or breaks your image. The temple is built into a west-facing cliff — morning light hits the front facade but leaves the deeper alcoves in shadow. By midday, harsh overhead sun flattens the texture and creates unflattering contrast.
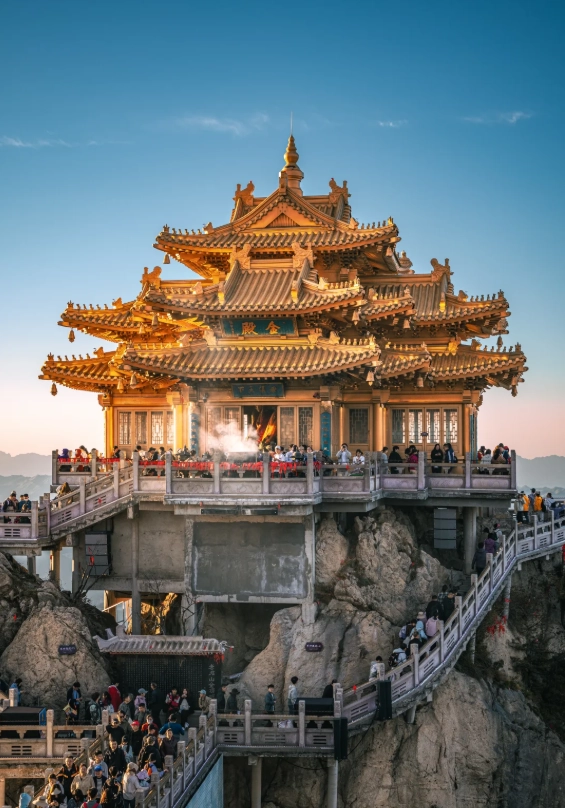
My go-to window: from 4:00 PM to sunset (varies by season; typically 5:00-6:30 PM in summer, 4:00-5:00 PM in winter). The warm side-lighting sculpts every bracket and beam. On clear days, the red pillars literally glow.
If you're a sunrise hunter, arrive by 6:30 AM in summer. The first light hits the top of the temple while the base remains in cool shade — a gorgeous contrast. But be warned: the site doesn't open until 8:00 AM (summer), so you'll be shooting from outside the fence.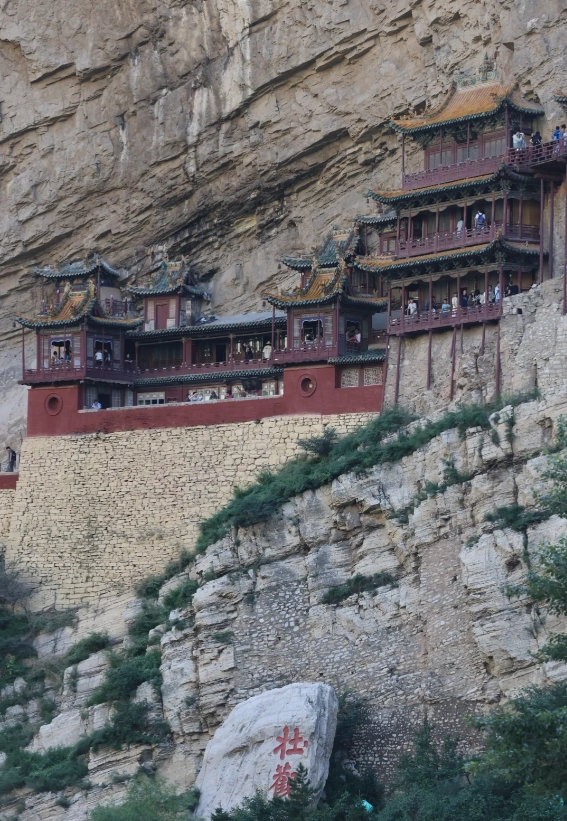
Top Photography Spots Around the Hanging Temple
The Classic Distant View from the Opposite Cliff
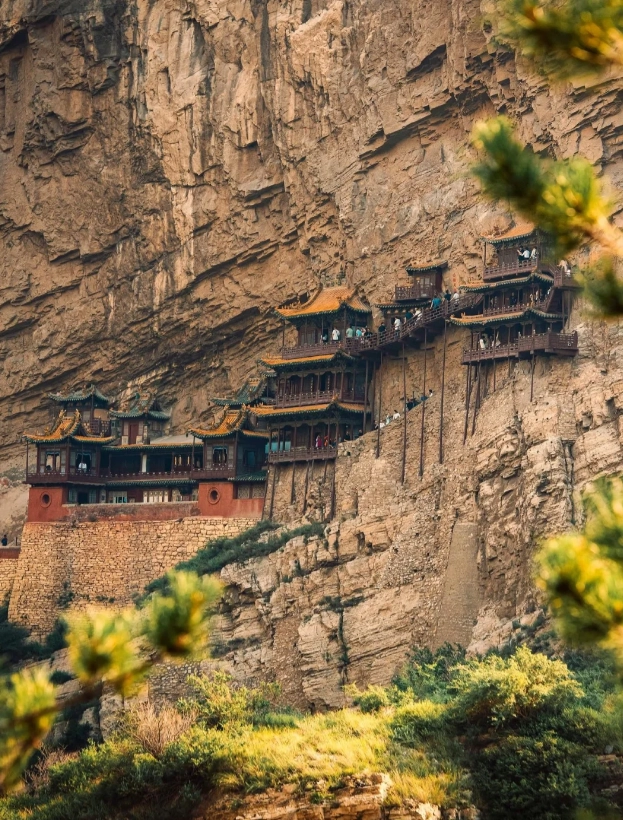
This is the iconic angle you see on postcards. Walk about 200 meters south from the ticket entrance along the paved path — you'll see a small platform with railings. From here, the entire temple clings to the cliff face with the valley in the foreground. A 70-200mm lens compresses the scene beautifully; with a wide-angle you can include the canyon below.
Crowd hack: Most tourists stop right at the entrance and shoot from the bridge. They miss this spot entirely. I literally lead my groups here and they go "wow." Heads-up: in peak season (May-October), the platform fills up by 10 AM. Go before 8 AM or after 4 PM.
The Dramatic Upward Angle from the Base
Stand directly under the temple near the rock wall. Look straight up. This perspective exaggerates the temple's precariousness. Use an ultra-wide lens (16-24mm full-frame equivalent) to capture the full height and the overhanging rocks. Best time: when the sun is behind the temple (afternoon) to create a silhouette effect.
Caution: The ground is uneven and sometimes wet from dripping spring water. Watch your footing — I've seen a fellow photographer nearly drop his gear into the ravine!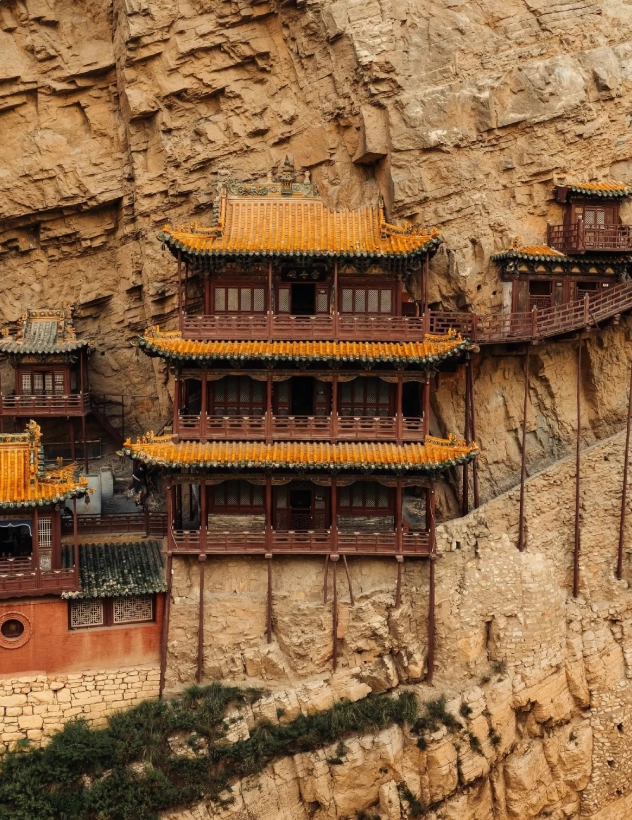
Intricate Details Inside the Temple
Once you enter, photography is allowed (no flash). The interiors are dimly lit — push your ISO to 1600 or 3200. Focus on the carvings, the bronze statues, and the ancient wooden brackets that support the structure. A fast prime lens (50mm f/1.8 or 35mm f/2) works wonders. Take a moment to capture the windows framing the distant mountains — it's a natural picture within a picture.
Practical Tips for Shooting at the Hanging Temple
How to Avoid Crowds in Your Photos
The temple is small and attracts huge crowds — up to 10,000 visitors per day during Chinese holidays. Three strategies work:
- Go at opening time: Be at the ticket gate 15 minutes before it opens. You'll be among the first 50 people inside. Sprint (politely) to the distant viewpoint first.
- Shoot from outside the fence: The public path along the river offers unobstructed views of the temple from multiple angles, even when the temple itself is packed.
- Use a long exposure: On a tripod, you can blur moving people into ghostly trails. A 10-stop ND filter helps during midday. But check: tripods are officially allowed on the outdoor paths but prohibited inside the temple (too narrow).
Gear Recommendations for the Best Results
| Lens Type | Best Use | Why |
|---|---|---|
| Ultra-wide (16-24mm) | Base upward shot, wide landscapes | Captures the full cliff and temple in one frame |
| Standard zoom (24-70mm) | General shots, interior details | Versatile for tight spaces and moderate distance |
| Telephoto (70-200mm) | Distant view compression | Brings the temple closer and isolates it from background clutter |
| Fast prime (50mm f/1.8) | Low-light interior, carvings | Sharp, compact, and great for dim conditions |
And don't forget a polarizing filter to cut glare from the sky and enhance the red paint.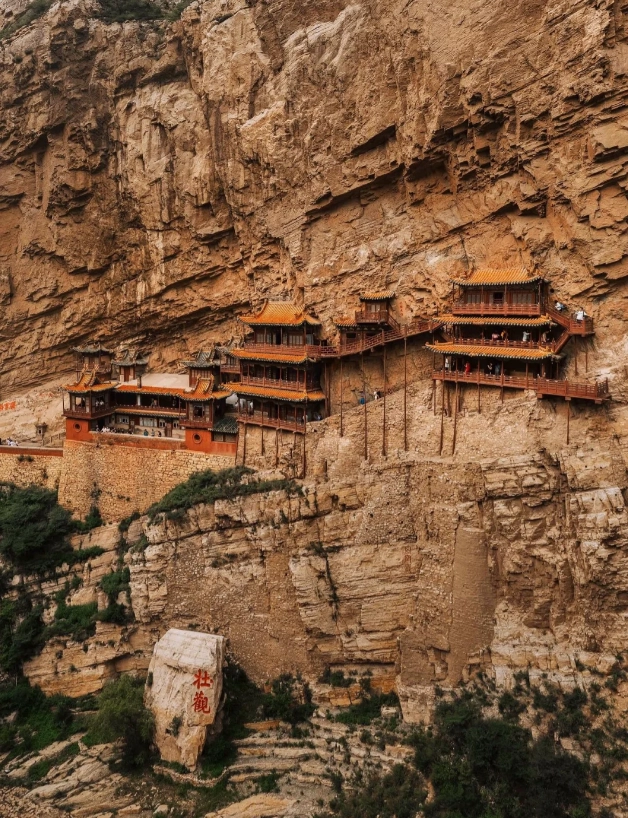
Getting There and Entry Details
Transportation from Datong
Datong is the main hub, about 80 km north. Three options:
- Bus: From Datong Bus Station (大同汽车站) take the bus to Hunyuan County (浑源县). Buses run every 30 minutes from 7:00 AM to 5:00 PM, cost about CNY 30, and take 1.5 hours. From Hunyuan, take a local taxi (CNY 20-30) for the final 10-minute drive to the temple.
- Private car/taxi: From Datong city center, a round trip with waiting time costs around CNY 300-400. Negotiate beforehand.
- Tour bus: Many Datong hotels offer Hanging Temple half-day tours for CNY 150-200 per person.
Address: Hunyuan County, Datong, Shanxi, China. GPS coordinates: 39.7294, 113.7381.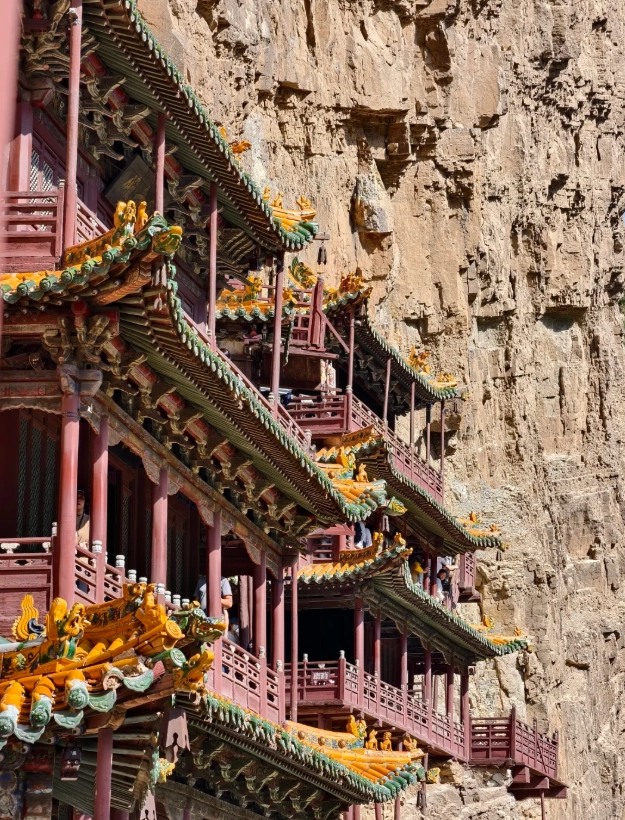
Ticket Booking and Opening Hours
This is where most foreigners trip up. You must pre-book tickets via the official WeChat mini-program (search "悬空寺"). It's entirely in Chinese. My tip: ask your hotel front desk to help you book — they're used to this. Without a reservation, you may be turned away, especially on weekends and holidays.
| Season | Hours | Ticket Price |
|---|---|---|
| Summer (Apr-Oct) | 8:00 AM - 5:30 PM (last entry 5:00 PM) | CNY 50 (adult), CNY 25 (student with ID) |
| Winter (Nov-Mar) | 8:30 AM - 4:30 PM (last entry 4:00 PM) | CNY 30 (adult) |
Cash not accepted at the gate — only WeChat or Alipay. If you don't have Chinese mobile payment, bring a Chinese friend or pay through your tour guide.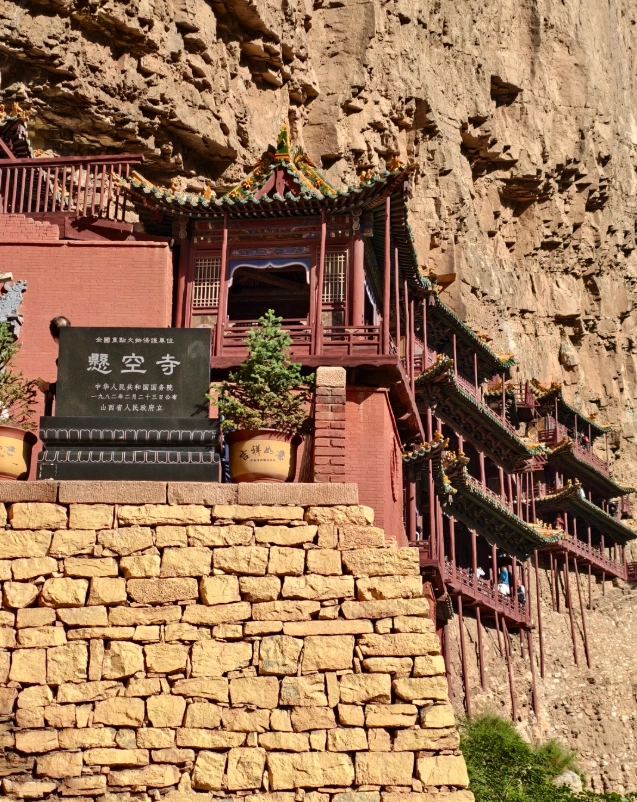
FAQ: Hanging Temple Photography Questions Answered
This content has been fact-checked to ensure informational precision.
Good info, but I left with mixed feelings. One of the viewpoints shown on the map was completely blocked by construction when I visited, and the guide didn’t mention that. Also, most of the best angles require a wide-angle lens, which isn’t made clear near the top. I managed to get a few nice frames, but I spent extra time trying to reproduce a photo that I simply couldn’t get with my kit lens. Adjust expectations if your gear is limited.
Great guide overall—the three main angles are accurate and the time-saving order is smart. I’m only knocking off one star because the lighting advice felt a bit general. My visit was hazy and I would have loved more tips for editing or alternative compositions in poor weather. Still, I got solid shots from the east platform and avoided the midday crowd disaster. Worth reading before you go.
Finally a guide that gets it. The staircase viewpoint near the end is worth the extra climb—I went at sunset and got a silhouette shot that’s now my phone wallpaper. I also appreciated the practical camera suggestions for the wooden pillars; they made a real difference in exposure. Even my non-photographer husband enjoyed following along. Well written, focused, and genuinely useful, not fluff.
This article made my trip. As a solo photographer I was worried about getting trapped behind tour groups, but the north-side-from-the-bridge angle is a hidden gem—I never would have found it alone. The advice to go right when the temple opens worked perfectly, and I ended up with the lower terrace almost to myself. The diagrams are clear and the route honestly saves at least an hour. Strong recommend.
I've been to Xuankong twice and this guide nailed the exact spots that most people just walk past. The morning hour when the sun hits the wooden pillars was spot on, and following the suggested order let me shoot the classic angle with zero crowds. Even the tip about the small reflection pool on the way out saved me from wandering around. Short on time but big on photography? This is the one.