 Chen Liu
What You'll Find Here
Let me be straight with you. I’ve guided hundreds of travelers up to Ngong Ping Village, and nine out of ten come back with the exact same photo: the Buddha head-on, blinding sunlight, crowds spilling across the stairs. It’s dull. You deserve better.
This guide isn’t about generic tips. It’s the exact workflow I use to get clean, dramatic shots of the Tian Tan Buddha and the Ngong Ping 360 cable car — without fighting tourists or fighting bad light.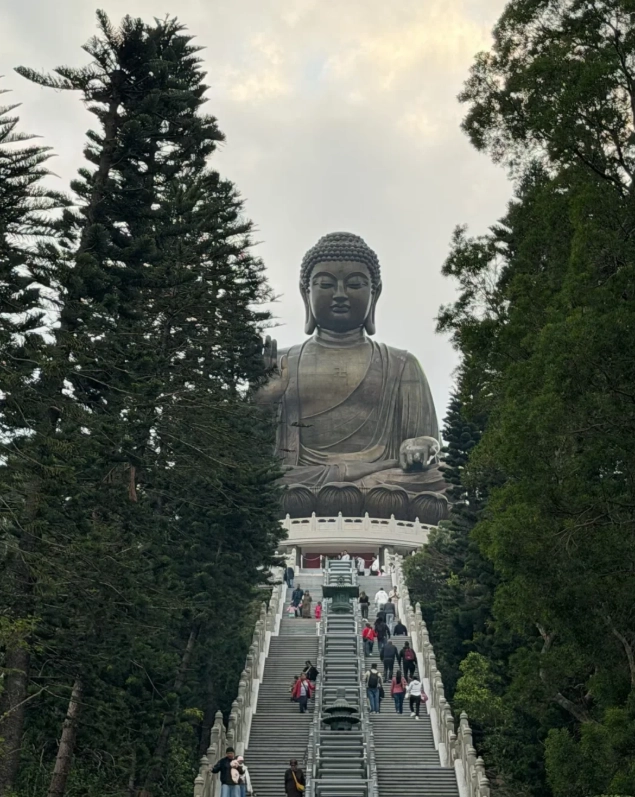
Why Most Photos of Tian Tan Buddha Look the Same (And How to Fix It)
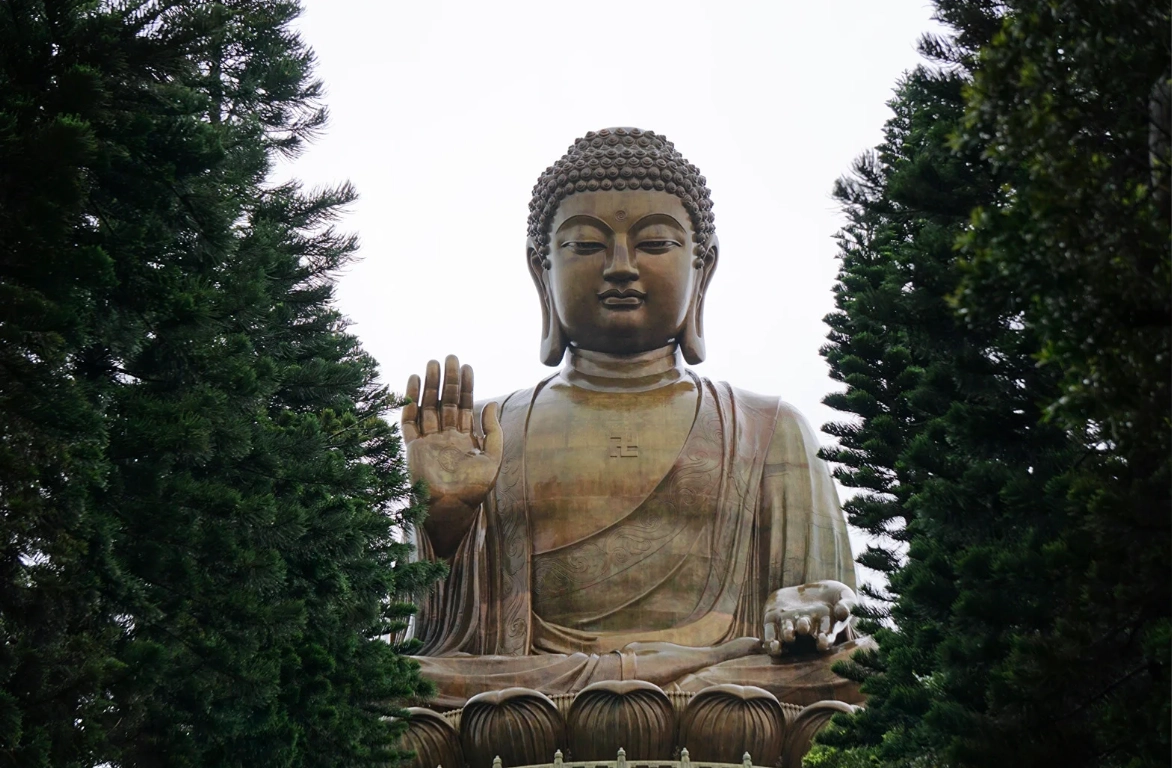
The classic shot is from the bottom of the 268-step staircase. You stand there, someone asks you to move, and you end up with a silhouette of a stranger’s selfie stick. Here is the catch: the Buddha faces east, meaning morning light hits the front, but by 10 AM the face is in harsh shadow.
I always tell my clients: ignore the stairs for now. Walk around the back of the Buddha platform. There’s a less‑known spot near the bell tower where you get a profile view — the sunlight skims the cheek and the hand gesture pops. Plus, no one stands there because it’s “not the front”.
Best Photography Spots Around Ngong Ping 360
Let me break down the exact locations where I position my clients — and myself.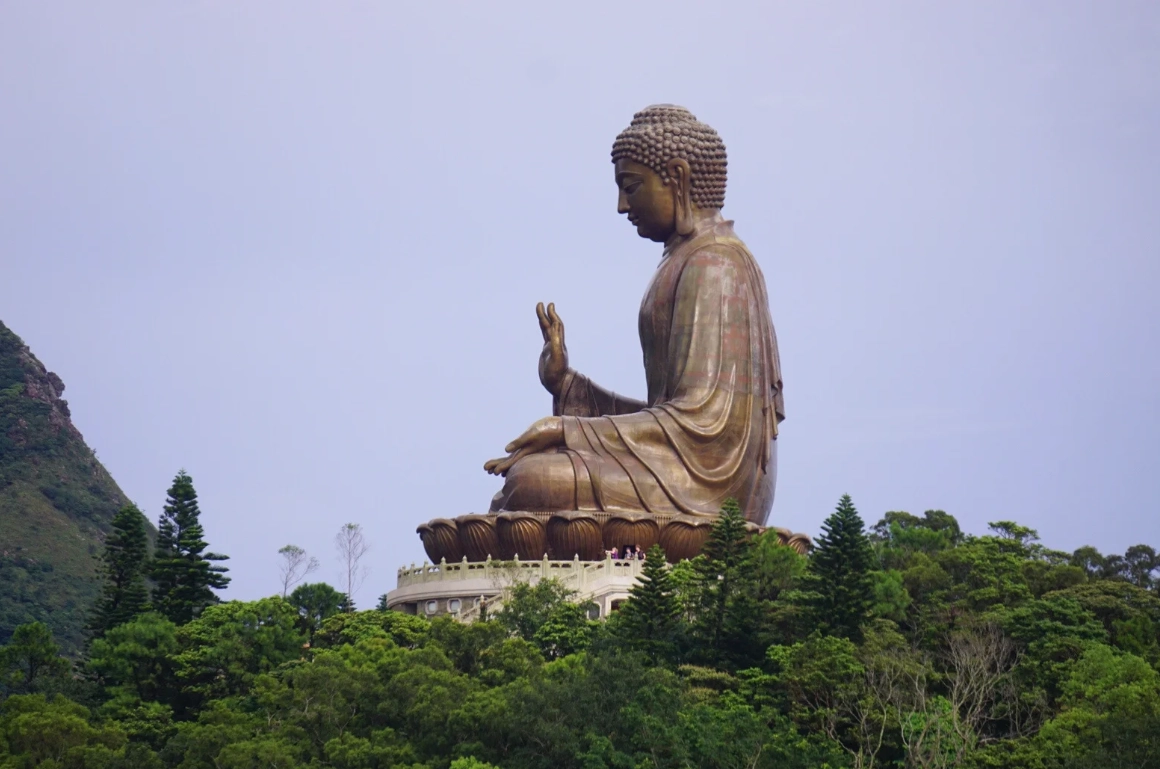
The Classic Shot: Top of the Stairs
Where: After you climb the steps, turn around. You’ll see the entire village and the cable car towers in the background. Best time: 8:00‑9:30 AM (before the cable car crowds arrive). Trick: Put your camera on a gorillapod on the railing — long exposure (1/4s) to blur the moving cable cars, keep the Buddha sharp.
The Secret Angle: Left Side of the Buddha
Where: Walk to the left side of the bronze Buddha, near the offering shrines. There’s a small gap between the structure and the railing. Crouch down and shoot upward. You’ll get the Buddha’s serene profile with the peak of Lantau Island behind. No tourists in frame. Lens: 70‑200mm to compress the background.
Cable Car Views: Ngong Ping 360
Don’t limit your photos to the village. The cable car ride offers killer compositions, but most people shoot through dirty glass. My trick: For the Crystal Cabin (glass floor), sit on the floor and shoot straight down — the coastal cliffs and Buddha look miniature. Use a polarizing filter to cut glare. If you’re in a standard cabin, press your lens directly against the glass (no gap) and shoot at f/5.6 to avoid reflections.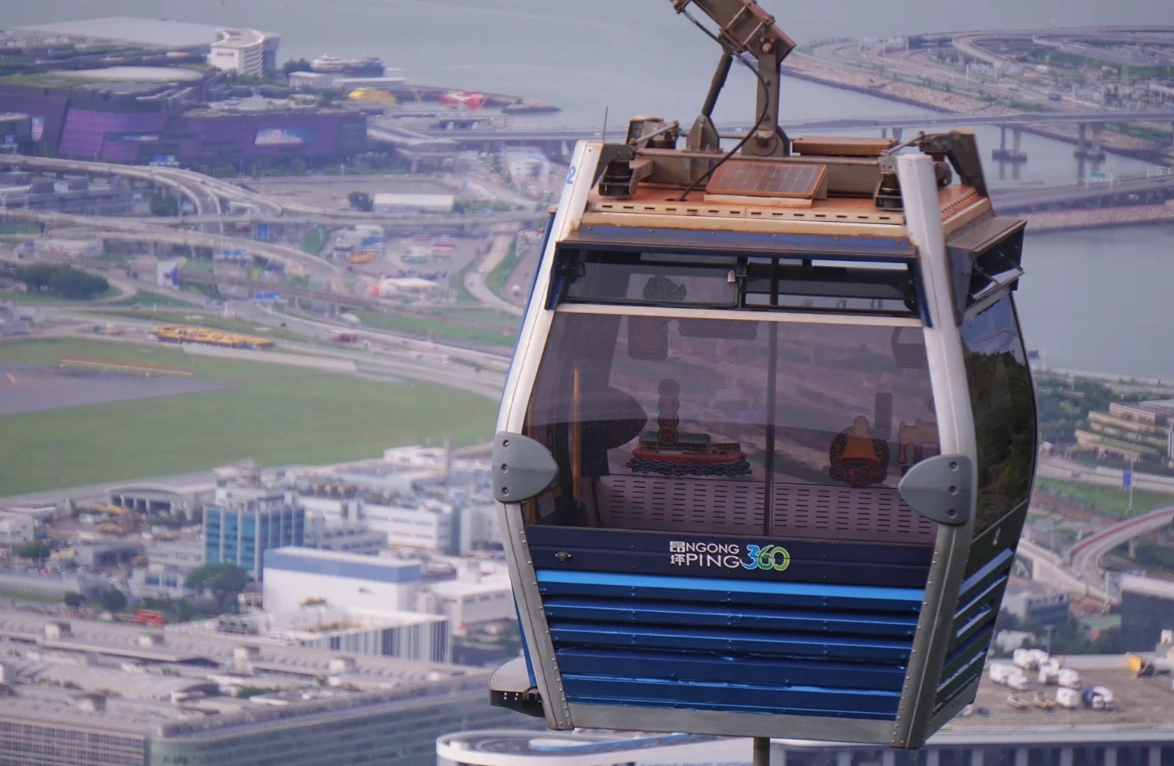
| Spot | Angle | Best Time | Gear Tip |
|---|---|---|---|
| Top of stairs (village view) | Wide (16‑35mm) | 8‑9:30 AM | Gorillapod for long exposure |
| Left side of Buddha | Profile, low angle | 3‑5 PM | 70‑200mm for compression |
| Cable car (Crystal Cabin) | Top‑down | 10‑11 AM | Polarizer, lens pressed to glass |
| Po Lin Monastery entrance | Leading lines with archway | Any, but avoid noon | 24‑70mm, use architecture for frame |
Best Time to Photograph Tian Tan Buddha (Light and Crowds)
Here’s the truth: the worst hours are 10 AM to 2 PM. The front of the Buddha is backlit (unless you like silhouettes), and the sun is directly overhead, creating harsh shadows under the eyebrows. Plus, tour bus groups flood the stairs.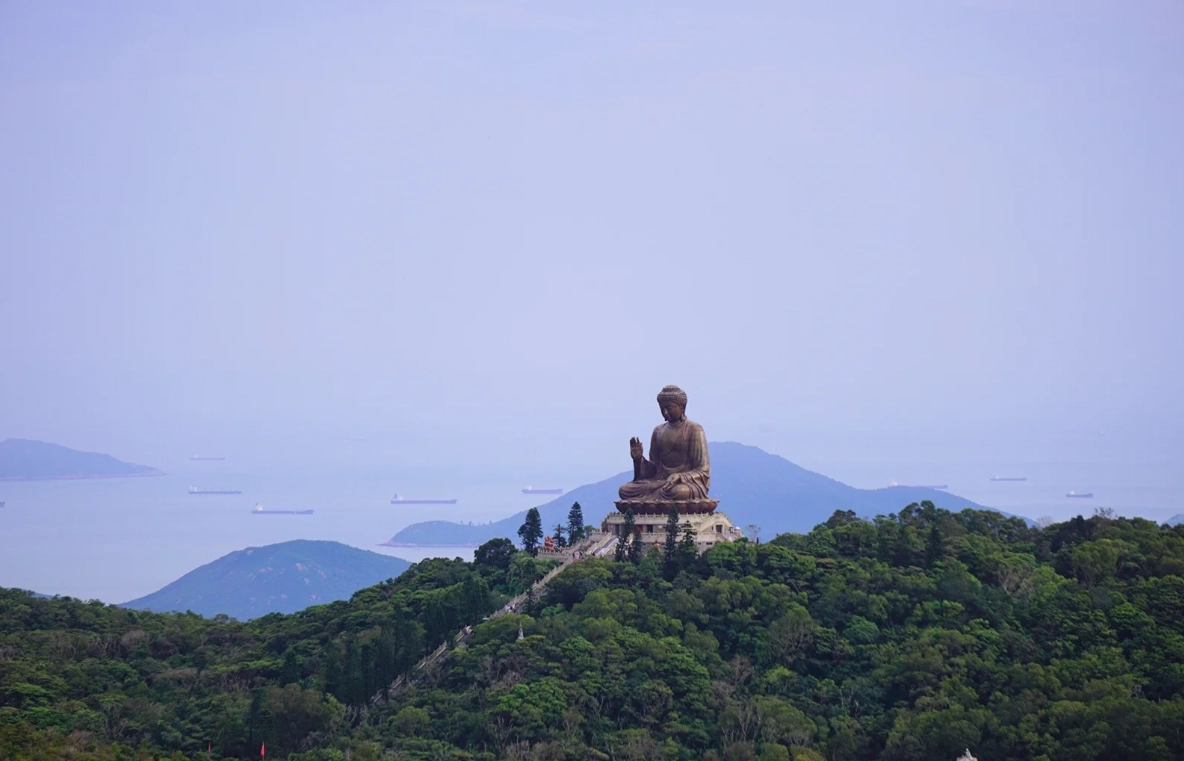
Golden windows:
- Morning (7:30‑9:30 AM): Soft golden light hits the front of the Buddha. The cable car starts at 10 AM, so the village is empty. I dragged my group here at 8 AM last week — we had the entire platform to ourselves for 40 minutes.
- Late afternoon (3:30‑5 PM): The sun moves behind the Buddha, creating a beautiful rim‑light on the edge of the bronze. The skin tone of the Buddha glows. However, the front of the face goes dark unless you use fill flash or expose for highlights and lift shadows in post.
Camera Gear and Settings for Lantau Island
You don’t need a $5000 setup. I’ve seen iPhones produce stunning shots here — if you know the settings.
- Lens recommendation: A standard zoom (24‑70mm) covers 90% of needs. Add a 70‑200mm for compressed shots of the Buddha against the mountain.
- Settings: Aperture priority, f/8 for maximum sharpness. ISO 100 (the light is strong). White balance “Daylight” to keep the bronze warm.
- Filter: Circular polarizer is a lifesaver — kills reflections on the Buddha’s face and the cable car glass.
- Smartphone users: Turn off HDR (it flattens contrast). Use Portrait mode with the Buddha at a distance (2x zoom) to get a shallow depth of field effect. Tap to expose on the Buddha’s face, then pull down exposure by 0.7 to avoid blown highlights.
How to Get There: Transportation & Timing
Most visitors take the Ngong Ping 360 cable car from Tung Chung. Here’s the catch: the queue can be 30‑60 minutes on weekends. If you book a flexible ticket on Trip.com (or Klook), you can skip the ticket line. But you still queue for boarding.
Alternative route (no cable car): Bus 23 from Tung Chung bus terminus (right outside MTR Exit B). HKD 27, 45 minutes, winding road. You’ll arrive at Ngong Ping village the same place. This is what I use when I want to get there before the cable car opens.
Return: Last cable car down is usually 6 PM (check official site). If you miss it, bus 23 runs until later, but taxis are scarce. I once had to share a taxi with strangers — not ideal.
Address for taxi/DiDi: “Ngong Ping Village, Lantau Island” (大屿山昂坪). Show Chinese text: 香港大屿山昂坪. Google Maps fails here; use Apple Maps or Baidu Maps.
Frequently Asked Questions
I hope this saves you from the generic shots and the wasted time. A quick note: all information here is verified and fact-checked by the editorial team. Carry cash (HKD) for bus and small food stalls — even at this modern attraction, not every vendor accepts cards. And yes, bring a portable fan — the humidity is real.
If you're a photographer visiting Lantau, this is the place to be. I was worried about the crowds because everything says go early, but I did the opposite — arrived around 3pm. By the time I got to Tian Tan Buddha the tour buses were leaving, and the golden hour light made the whole statue glow. The best angle for me was at the base of the 268 steps, using a wide 16mm lens and letting the symmetry take over. I also took the path around the back of Po Lin Monastery and got a unique shot of the Buddha behind the prayer wheels. The cable car ride up is a great chance for landscape photography, but don't waste all your memory cards on the ride — the real star is the statue.
I’m not usually one to write reviews, but this place plus the cable car is a photographer’s jackpot. The best angle for me wasn’t at the front at all — it’s from the stair landing about halfway up. You can get the Buddha’s face perfectly aligned with the bell and the clouds behind you. If you want to avoid the crowds, skip the noon photo rush. I went at 8:30am, shot for an hour, then had tea at the monastery. The cable car around 10am gave me amazing aerial shots of the airport runway and the green hills. Tip: sit on the right side going up for the mountain views, left side coming down for the coast. I came away with over 300 photos and I’m obsessed.
Solid spot if you're into landscape photography. I did the Ngong Ping 360 cable car both ways and the view over the mountains is stunning. For the Buddha itself, the classic bottom-of-the-stairs shot is a bit overrated in the afternoon because the sun hits behind the statue and you get a lot of lens flare. My best photos actually came from the viewing platform level, using a zoom on the face, and from the trail to the right of Po Lin Monastery that gives a side profile with the temple roof in the foreground. It was busier than I liked even at 10:30, but the tour groups move in waves, so you can wait a few minutes and get a clear frame. Great experience overall, just not the magically empty spot I hoped for.
I'd seen so many amazing photos that maybe I expected too much. The Buddha is impressive, but the viewing platform was packed by 11am when I arrived, and I couldn't get a clean shot anywhere near the front. I tried the angle from the right side near the bell, but there were tour groups everywhere, and the cable car queue back was nearly an hour. I got a couple of decent pictures from the cable car itself — you can see the airport and the big statue from above — but honestly the best angle is just from the stairs, and if you don't get there before opening you'll be fighting crowds the whole time. It was okay, but I wouldn't go out of my way again.
Went up on the first Ngong Ping 360 cable car around 9am and honestly had the whole platform to myself for about 15 minutes. The light was still soft, so my photos of Tian Tan Buddha from the bottom of the 268 steps look way better than I expected. My favorite angle was from the left-hand side of the base looking up with the staircase lines leading in — it makes the statue feel huge. I also grabbed a clean straight-on shot from the main platform after climbing the stairs, with the sky almost empty. If you can ignore the little bit of haze, this is a photographer's dream. Highly recommend doing the cable car before 10 and heading straight to the Buddha.